Door Assembly RemovalUpdated 5 months ago
So your Fly6 Pro side door has proven faulty. We've sent you a Replacement Door Assembly, and you're ready to install it. Today we'll cover removing the old side door from your Fly6 Pro and everything you need to perform the work, things you need to be careful of, and just general advice to make sure you feel comfortable working on your device.
Estimated Time required (disassembly only): 5 Minutes
Difficulty: Very easy, though some springs that may go flying... spare included in replacement parts.
Before we get started: required tools
- A long shank Philips Head screwdriver (PH1 recommended)
- Your Fly6 Pro!
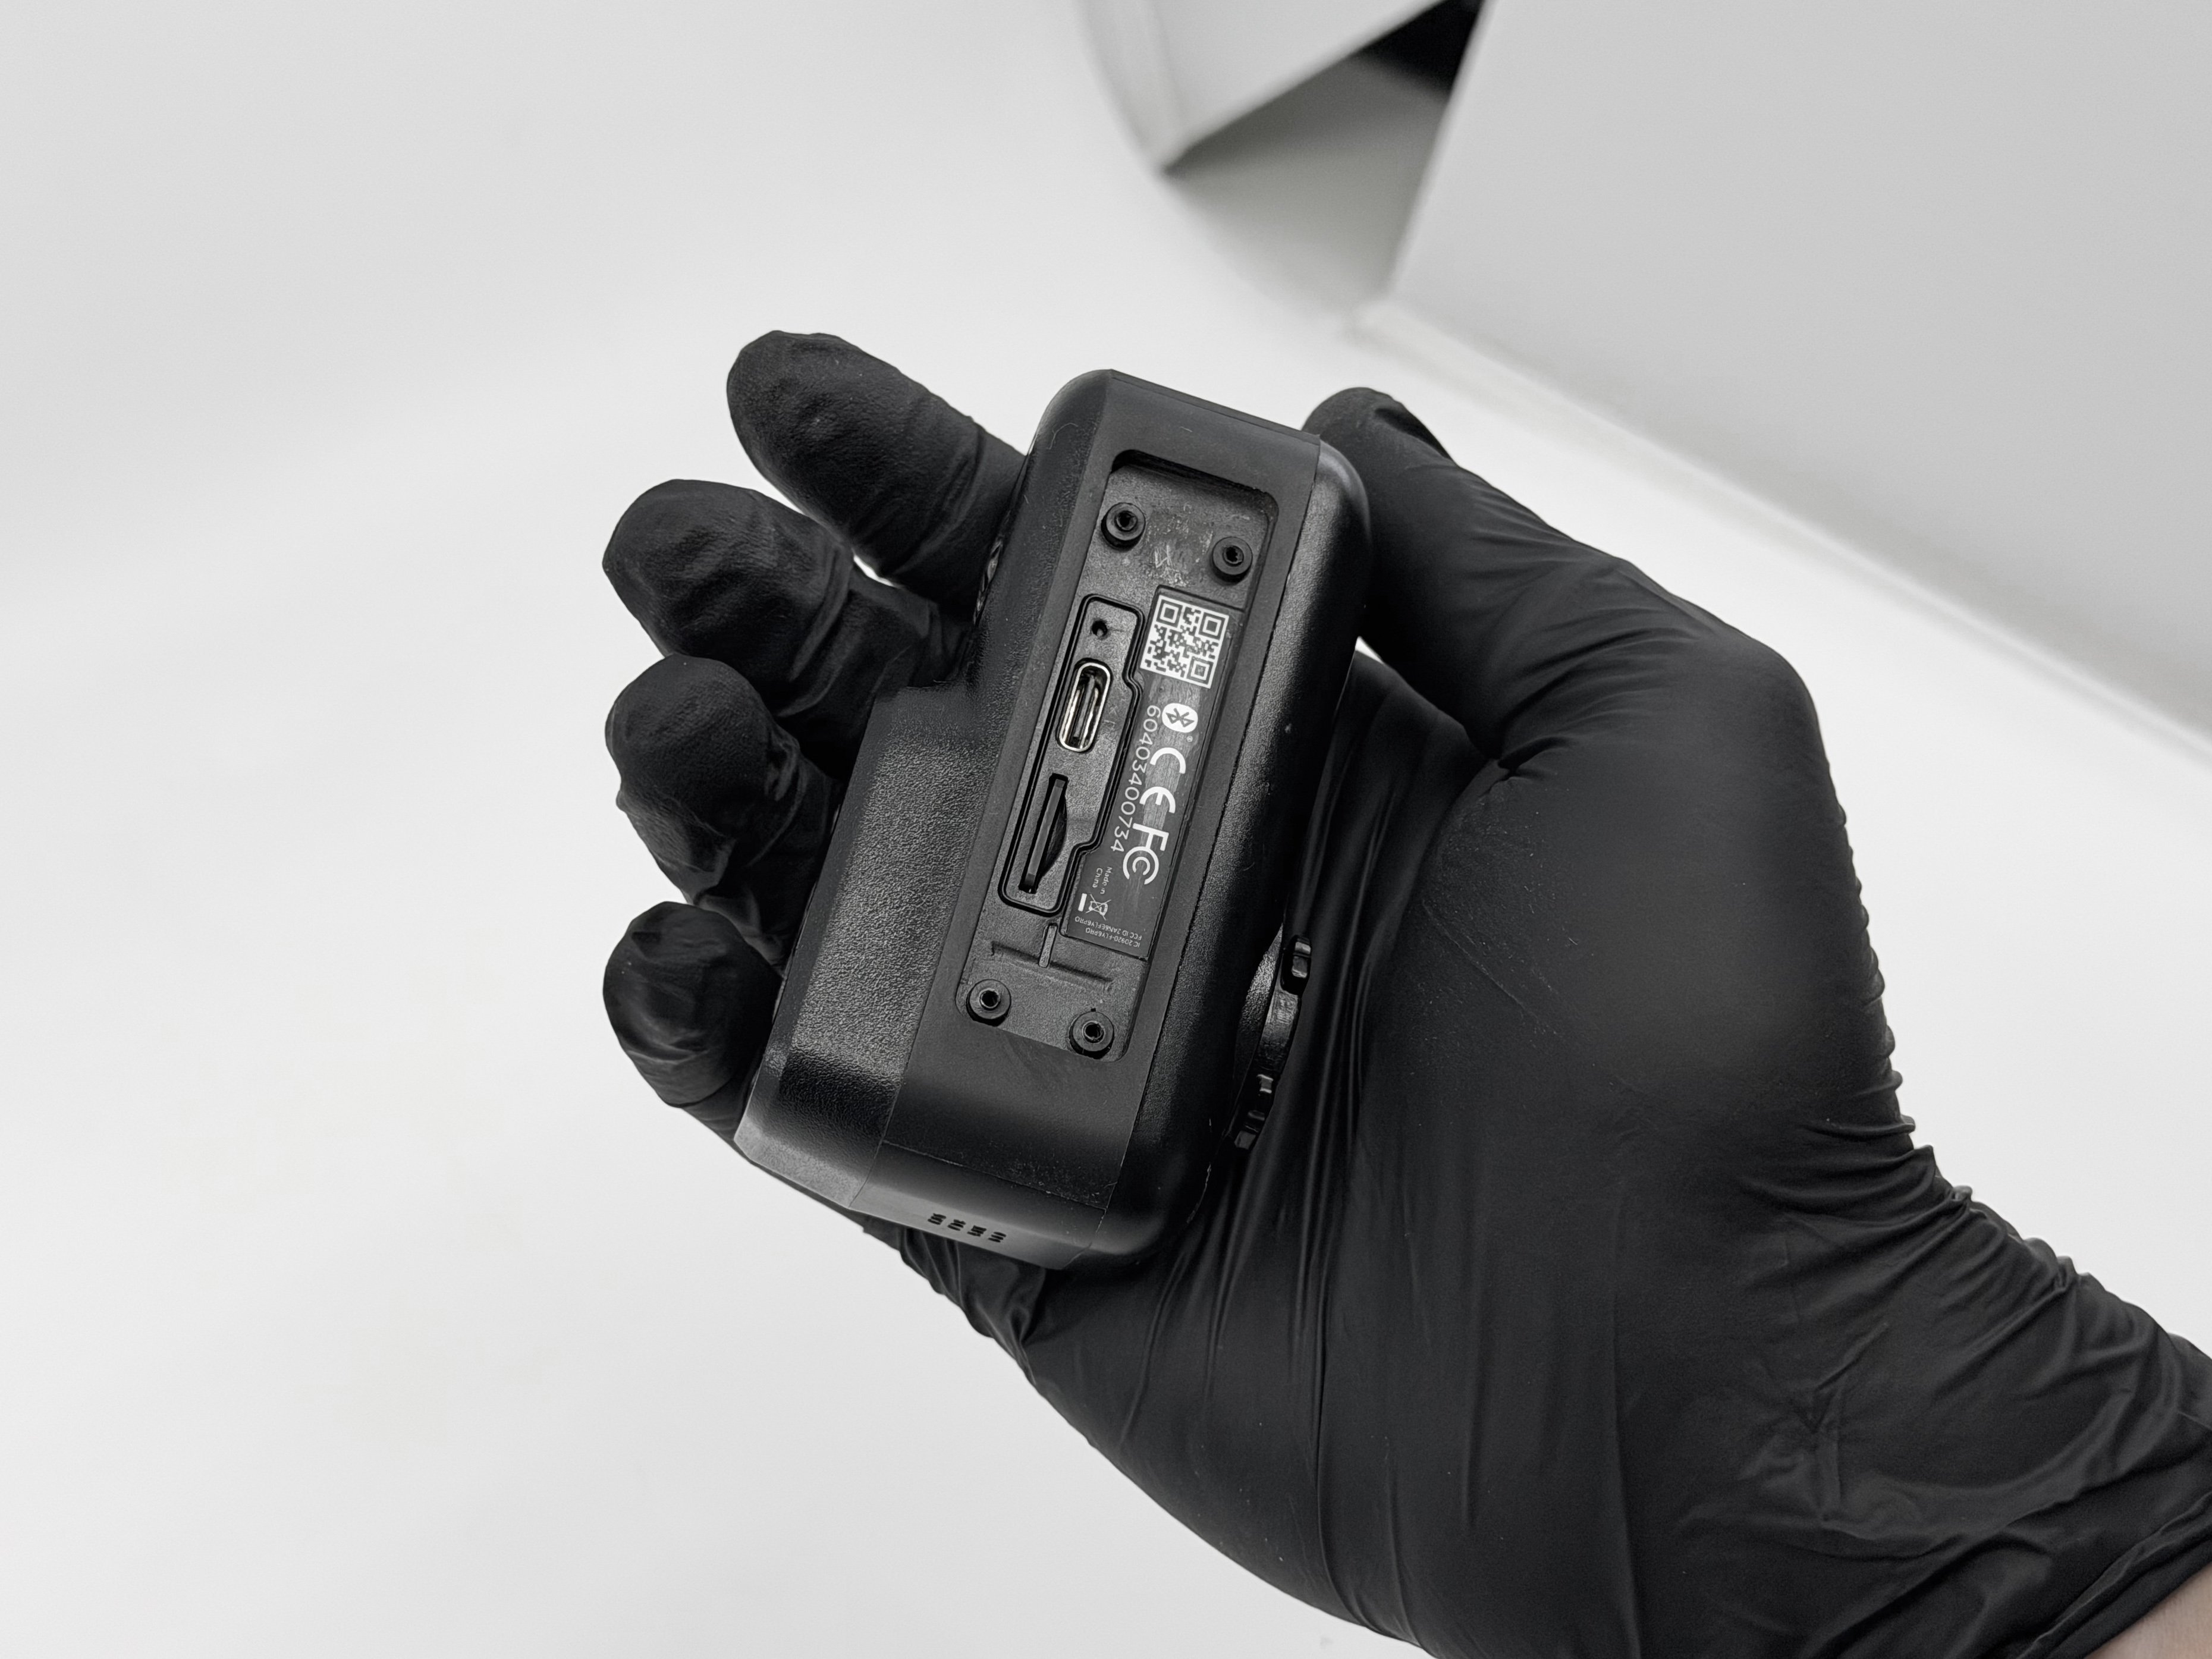
Step 1: Opening Door and Removing Hinge Screws
Open the door on your Fly6 Pro as you would when removing the memory card. If your hinge is broken and your door missing, you may proceed, but perhaps in the future you should be a little more careful with your Fly6 Pro...
Using your screwdriver, undo the screws on the hinge. 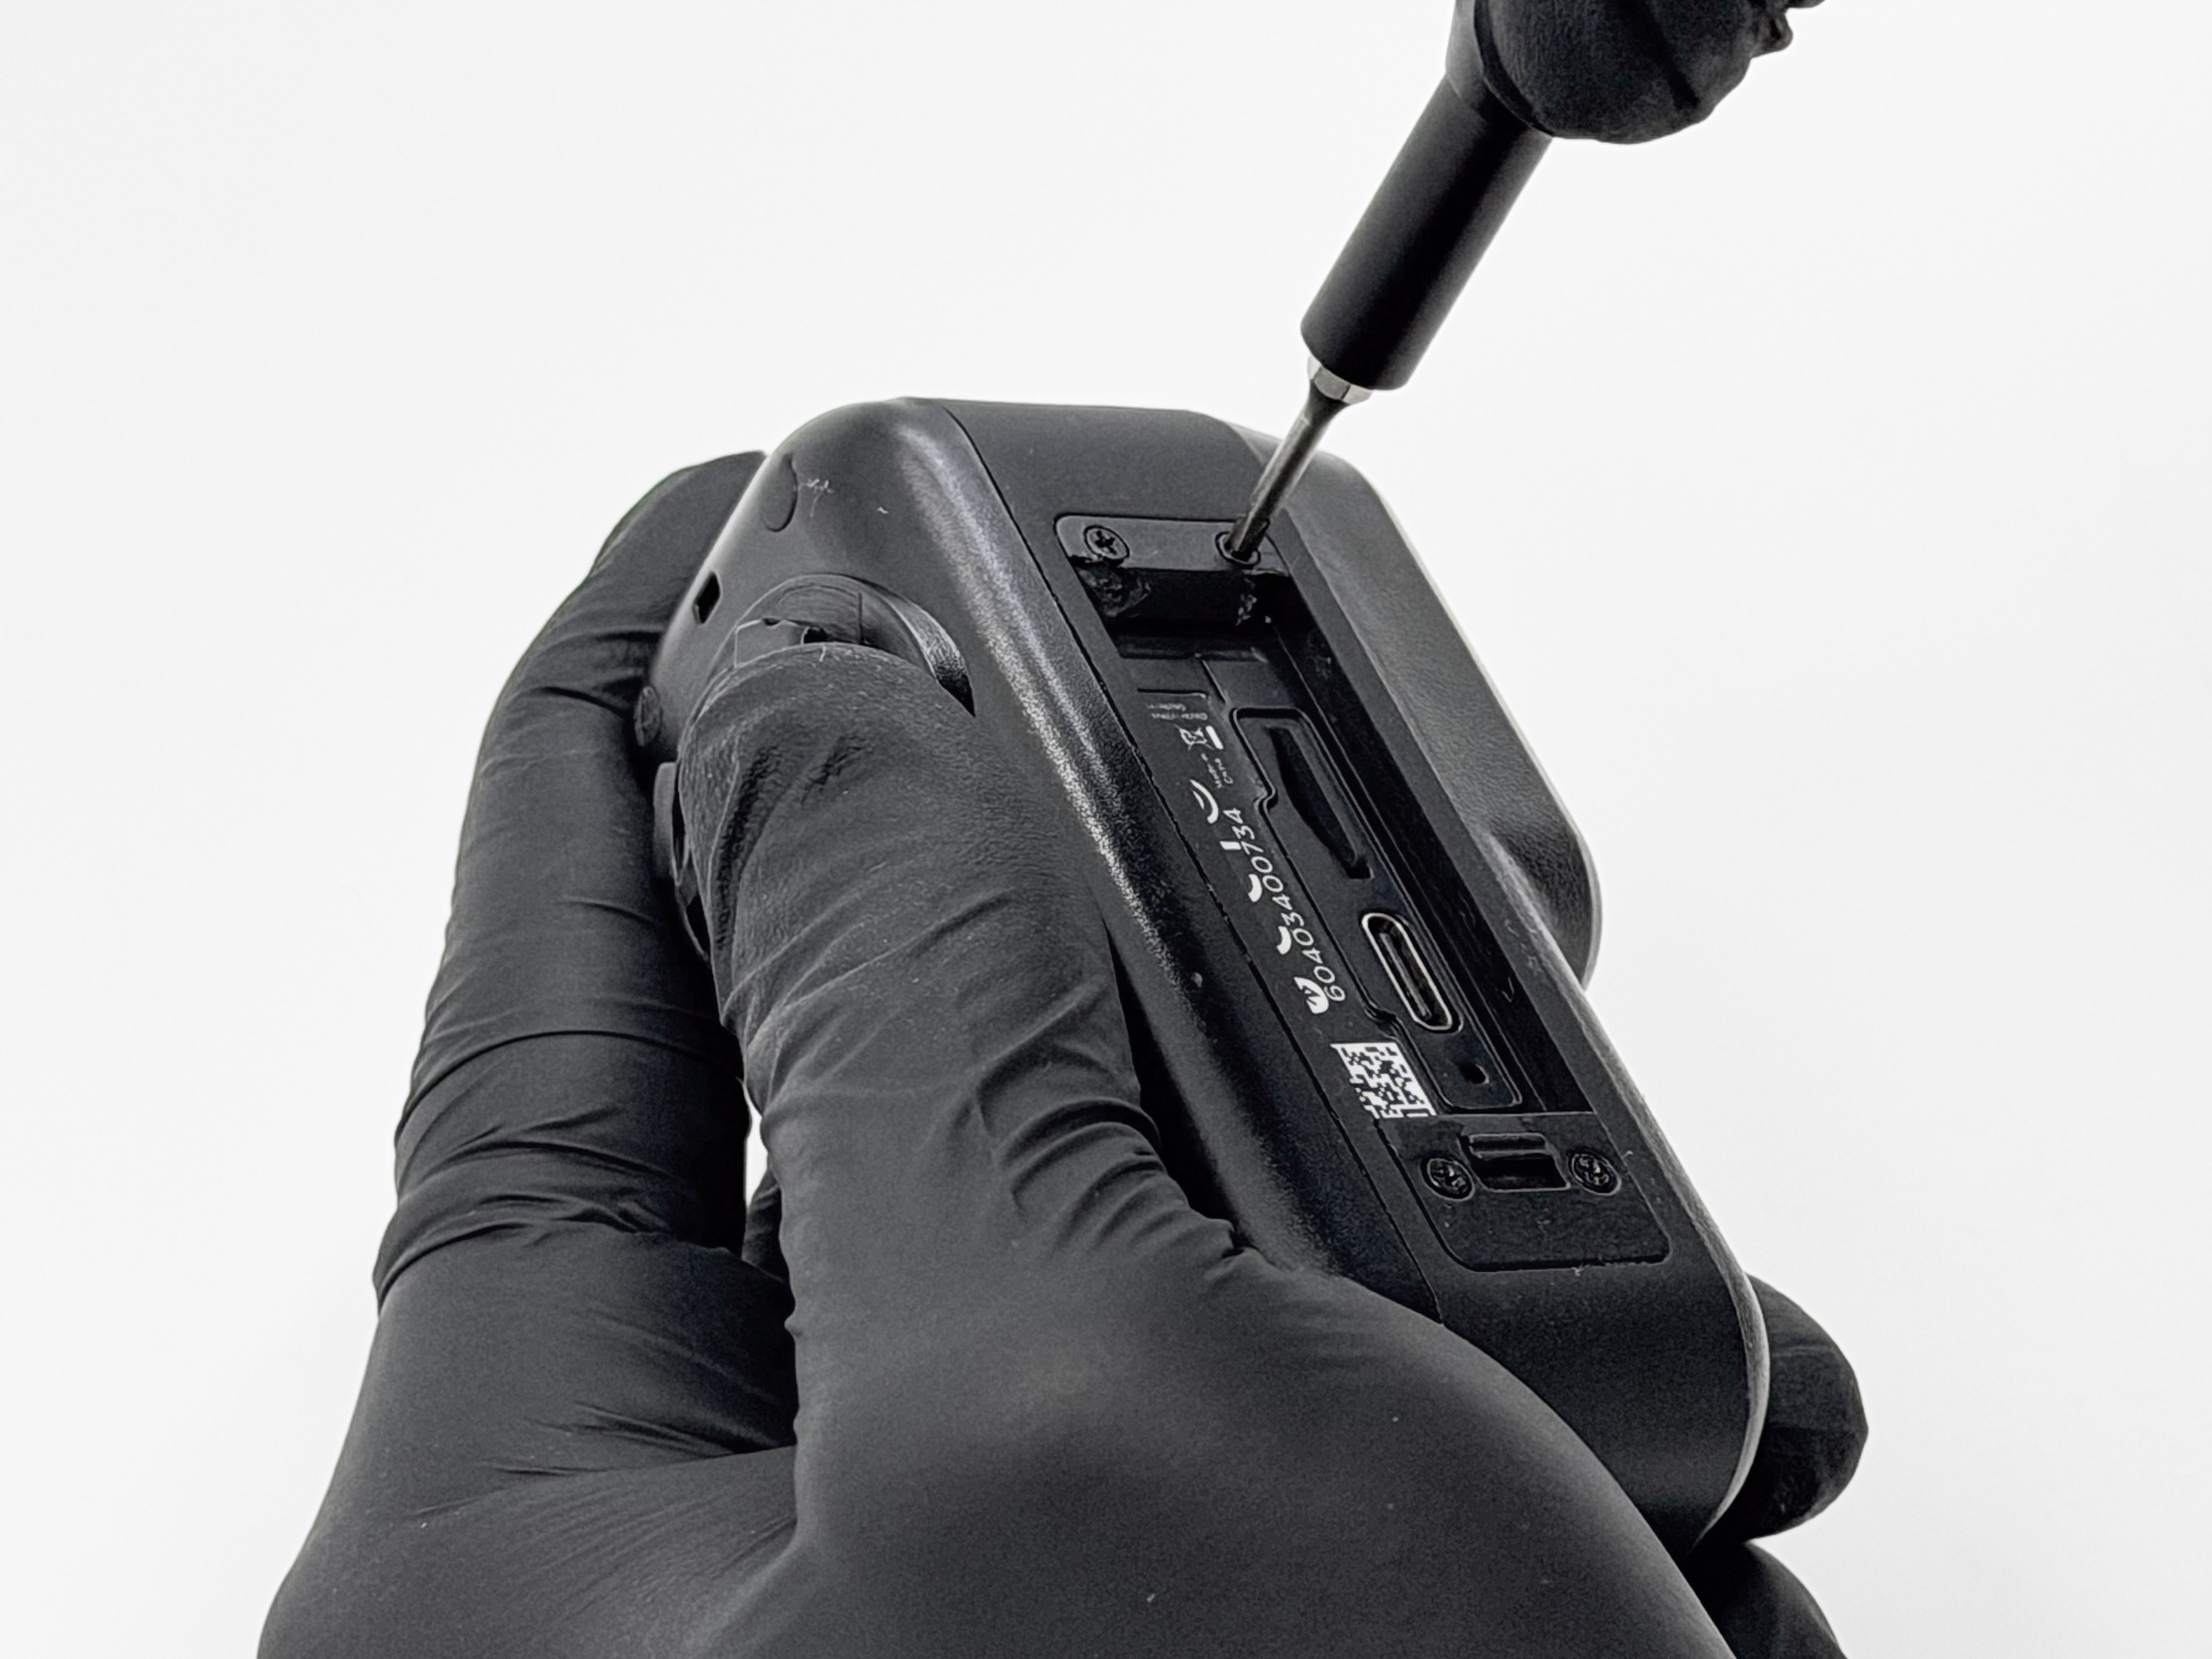
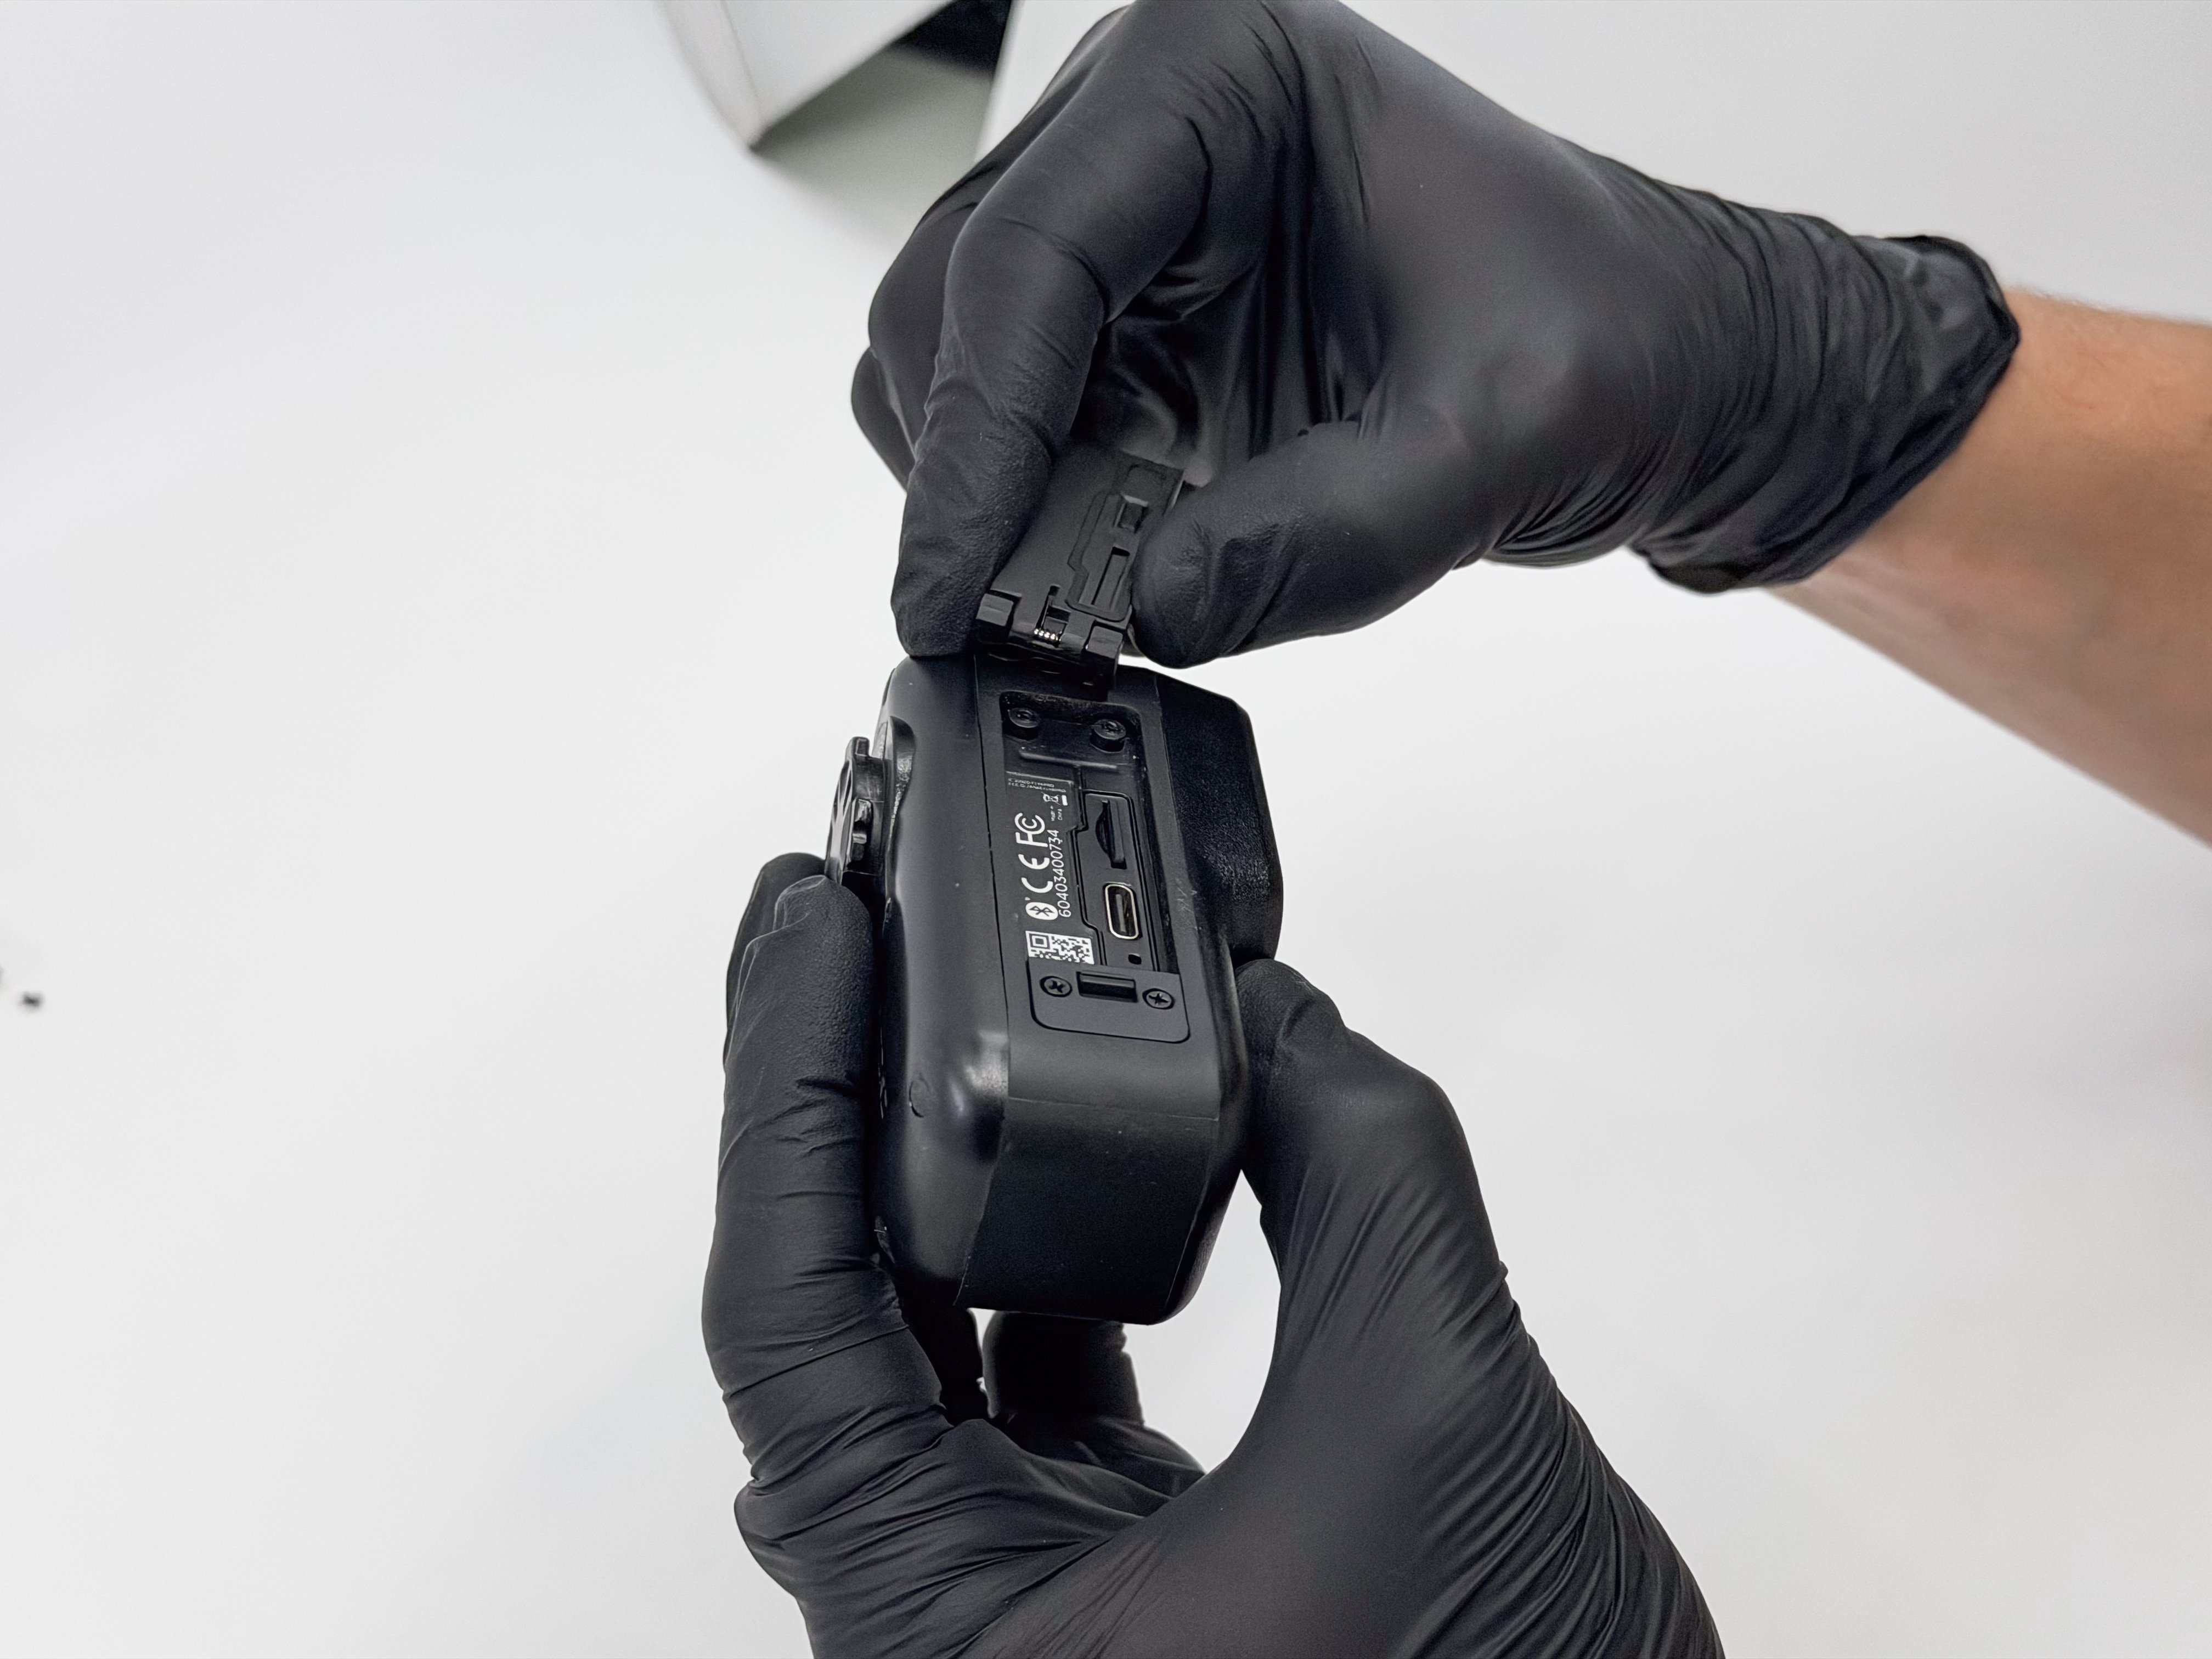
Step 2: Removing Door and Hinge
Once the screws are removed, grab the door and pull on it to remove the hinge from the housing. This may feel a little stubborn at first but don't fret, you won't break anything!
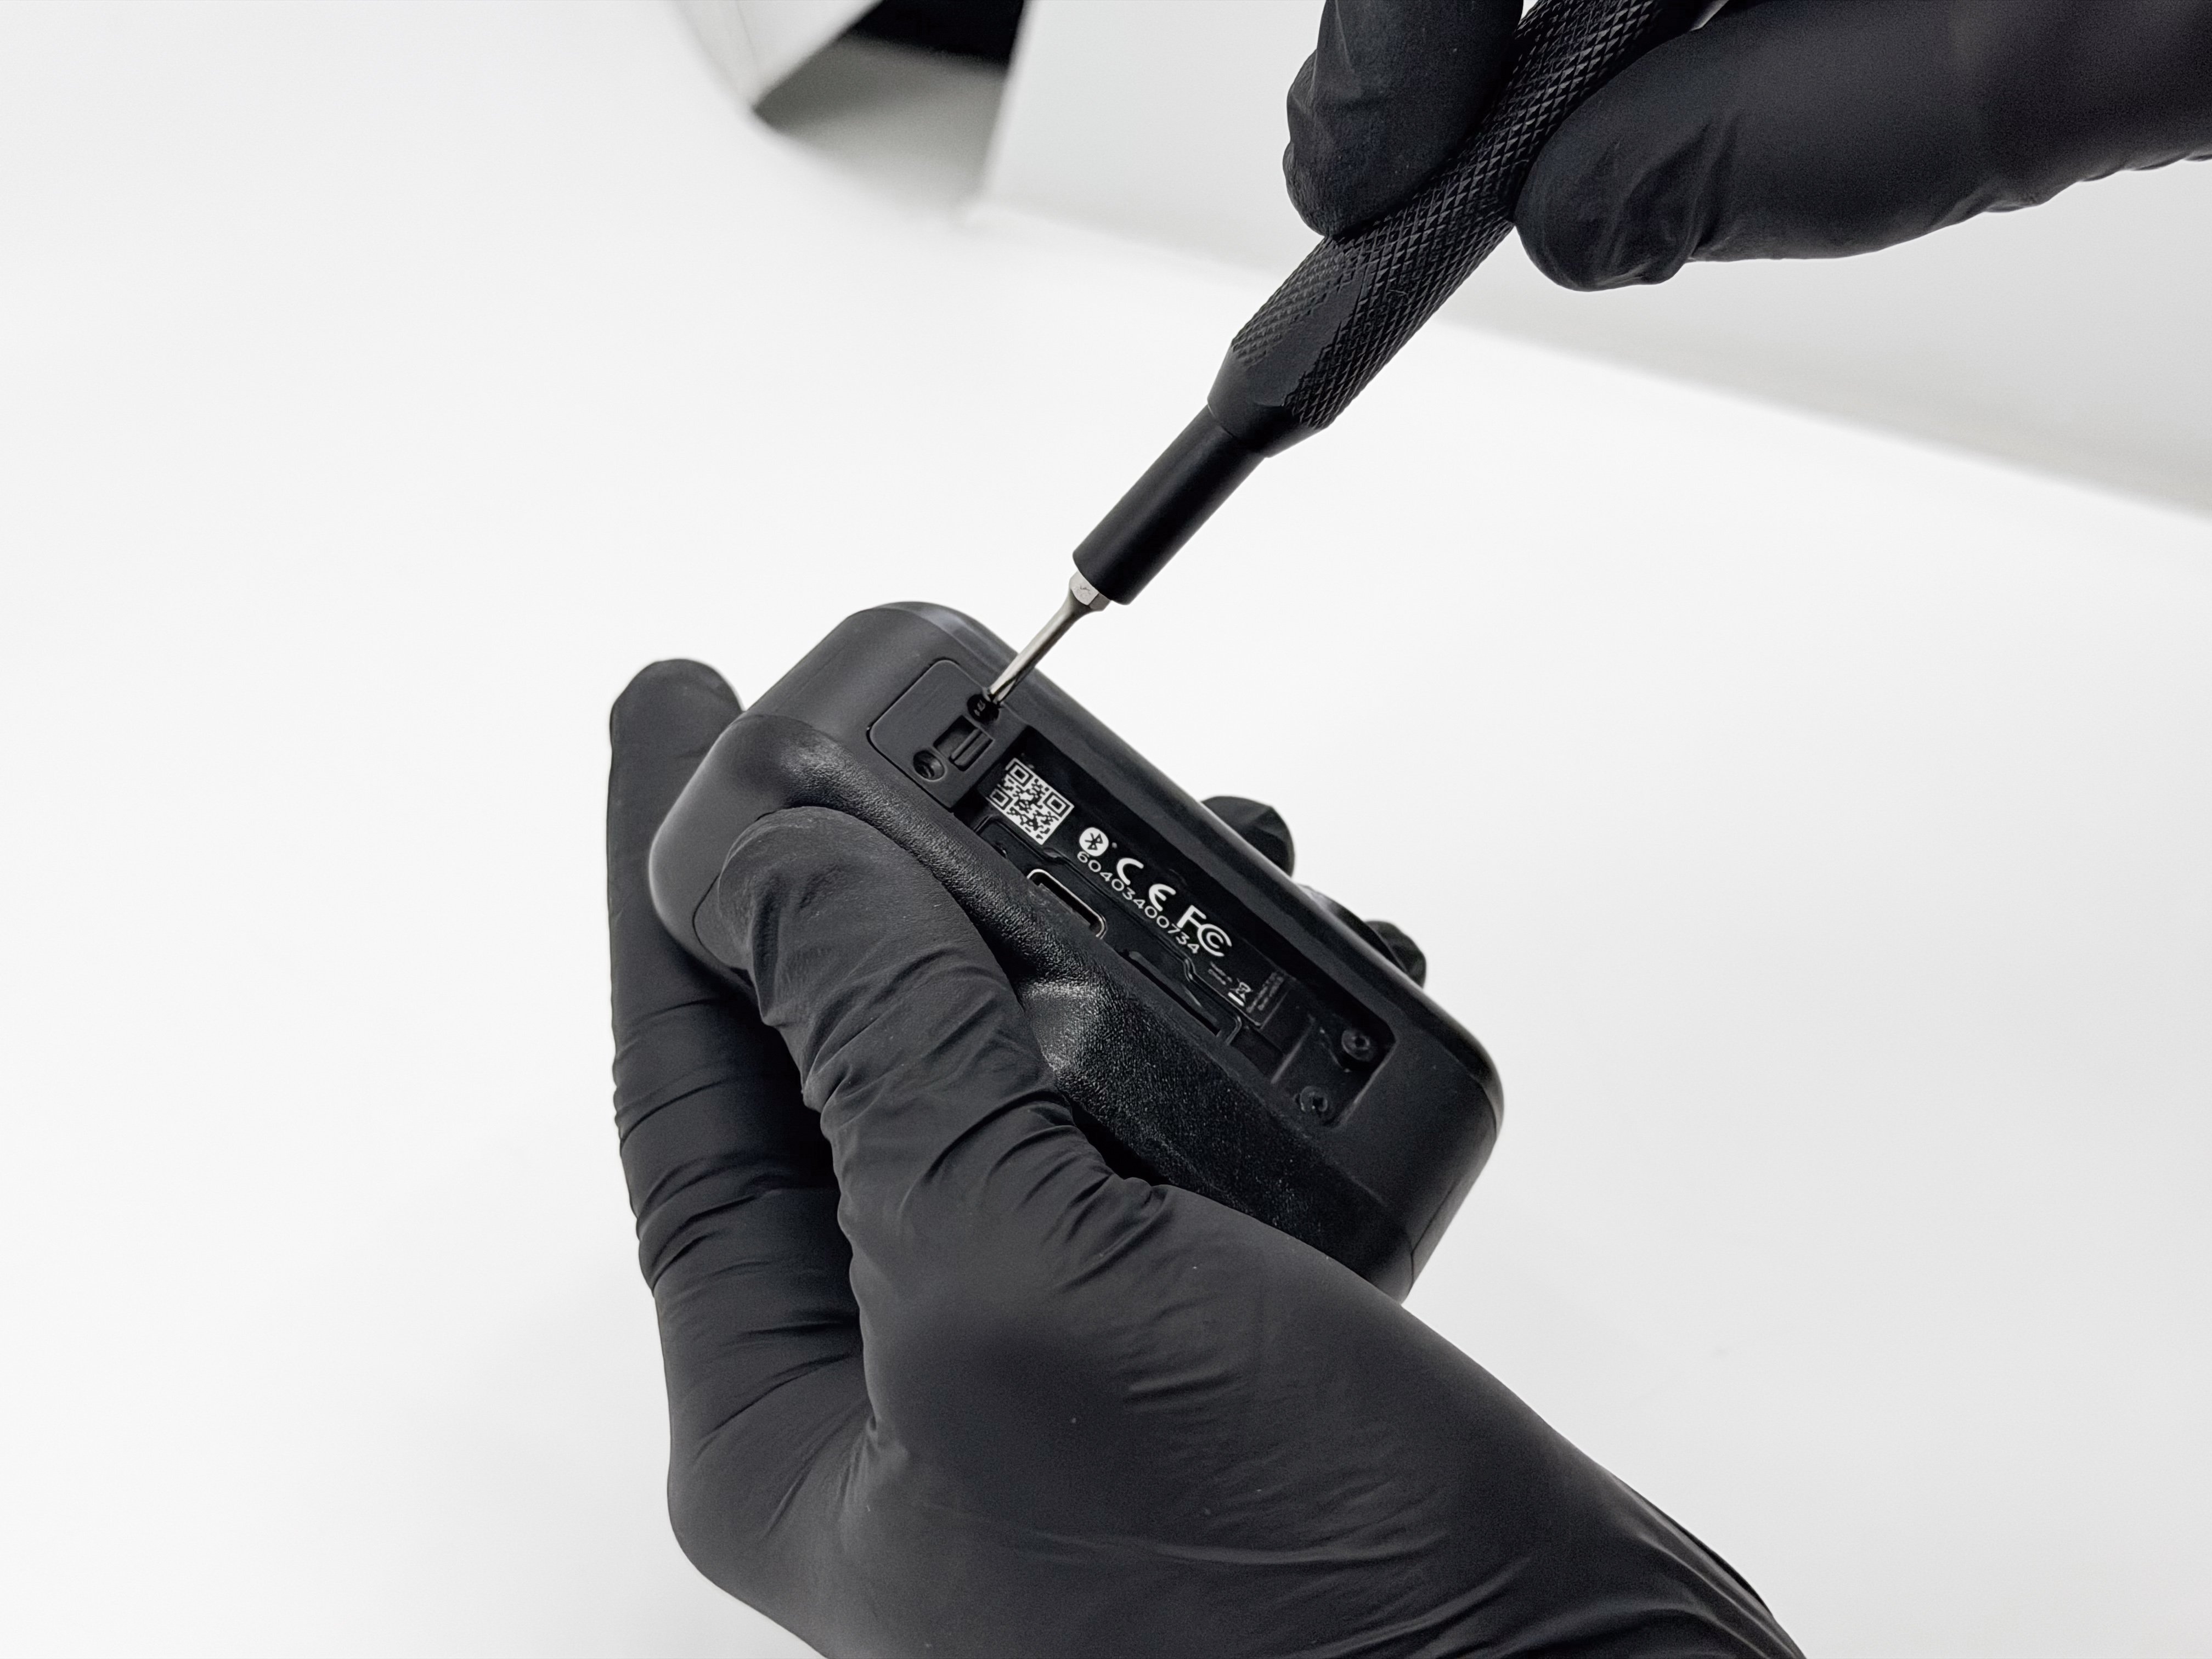
Step 3: Remove the Latch Screws
Using your screwdriver again, undo the screws at the other end of the door assembly.
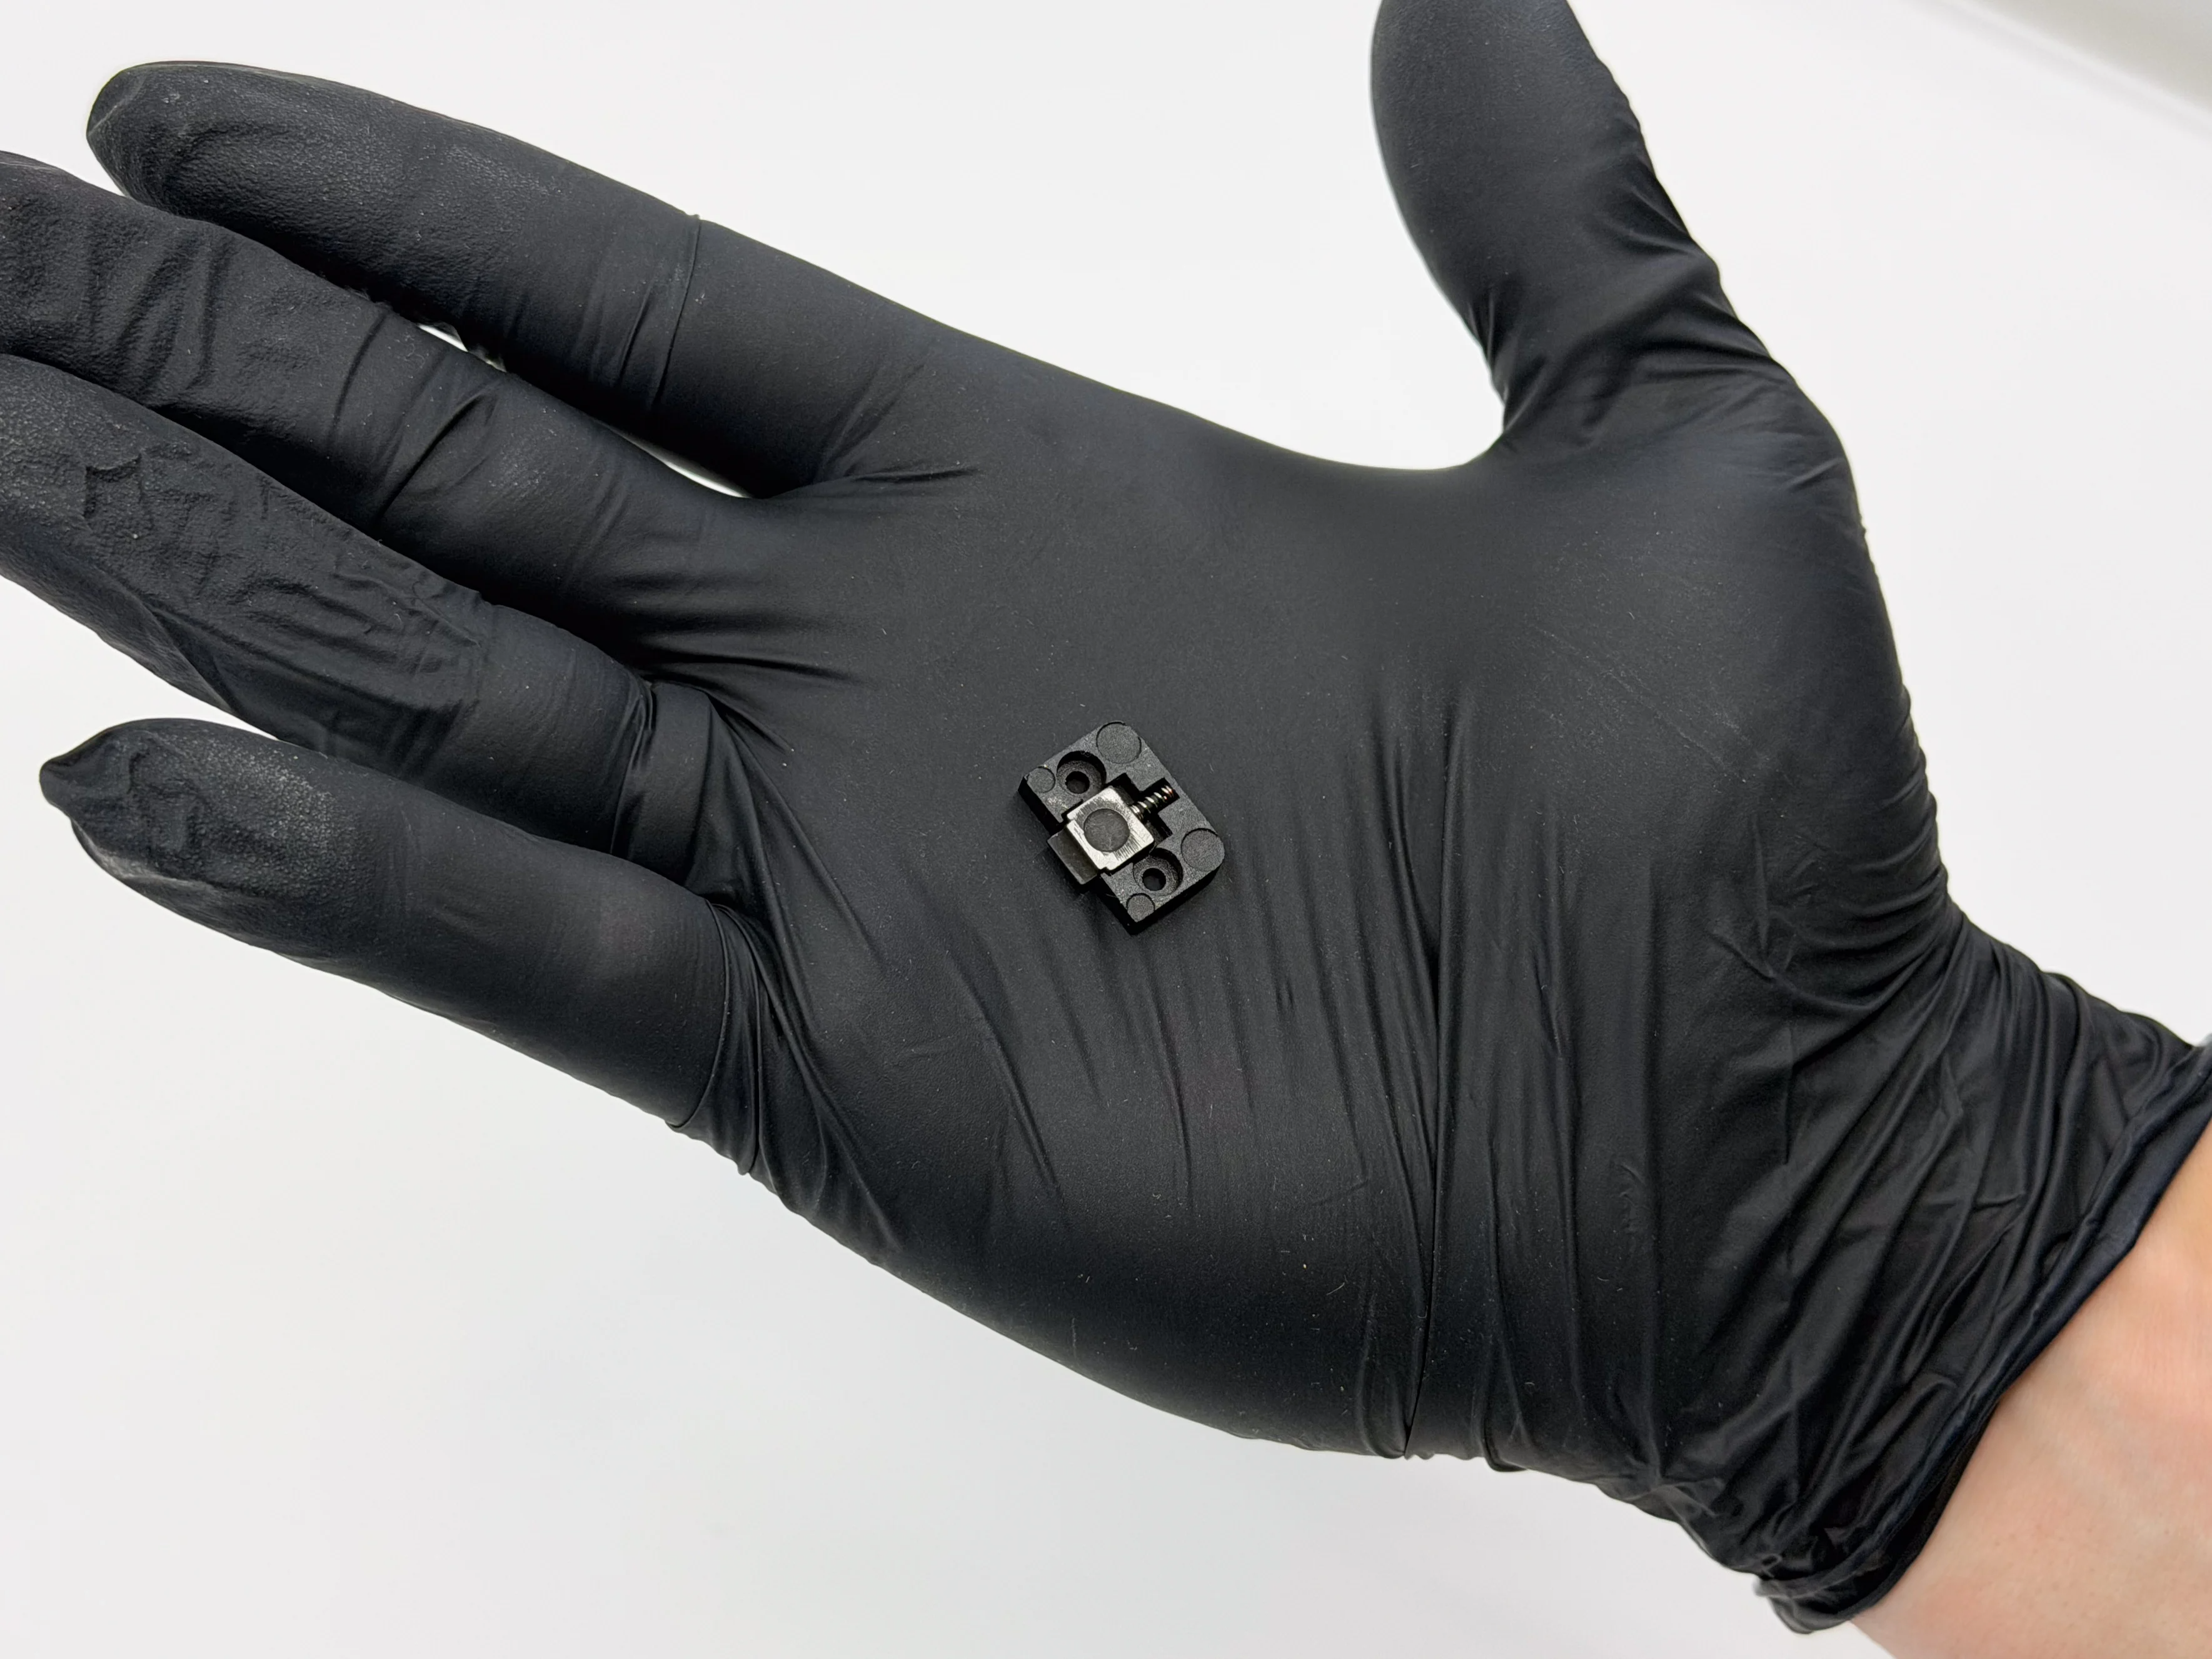
Step 4: Removing the Latch
Using your screwdriver or a fine pry tool, gently lift the latching system away from the device body. Do this slowly, as there is a spring in this system that you don't want to lose.
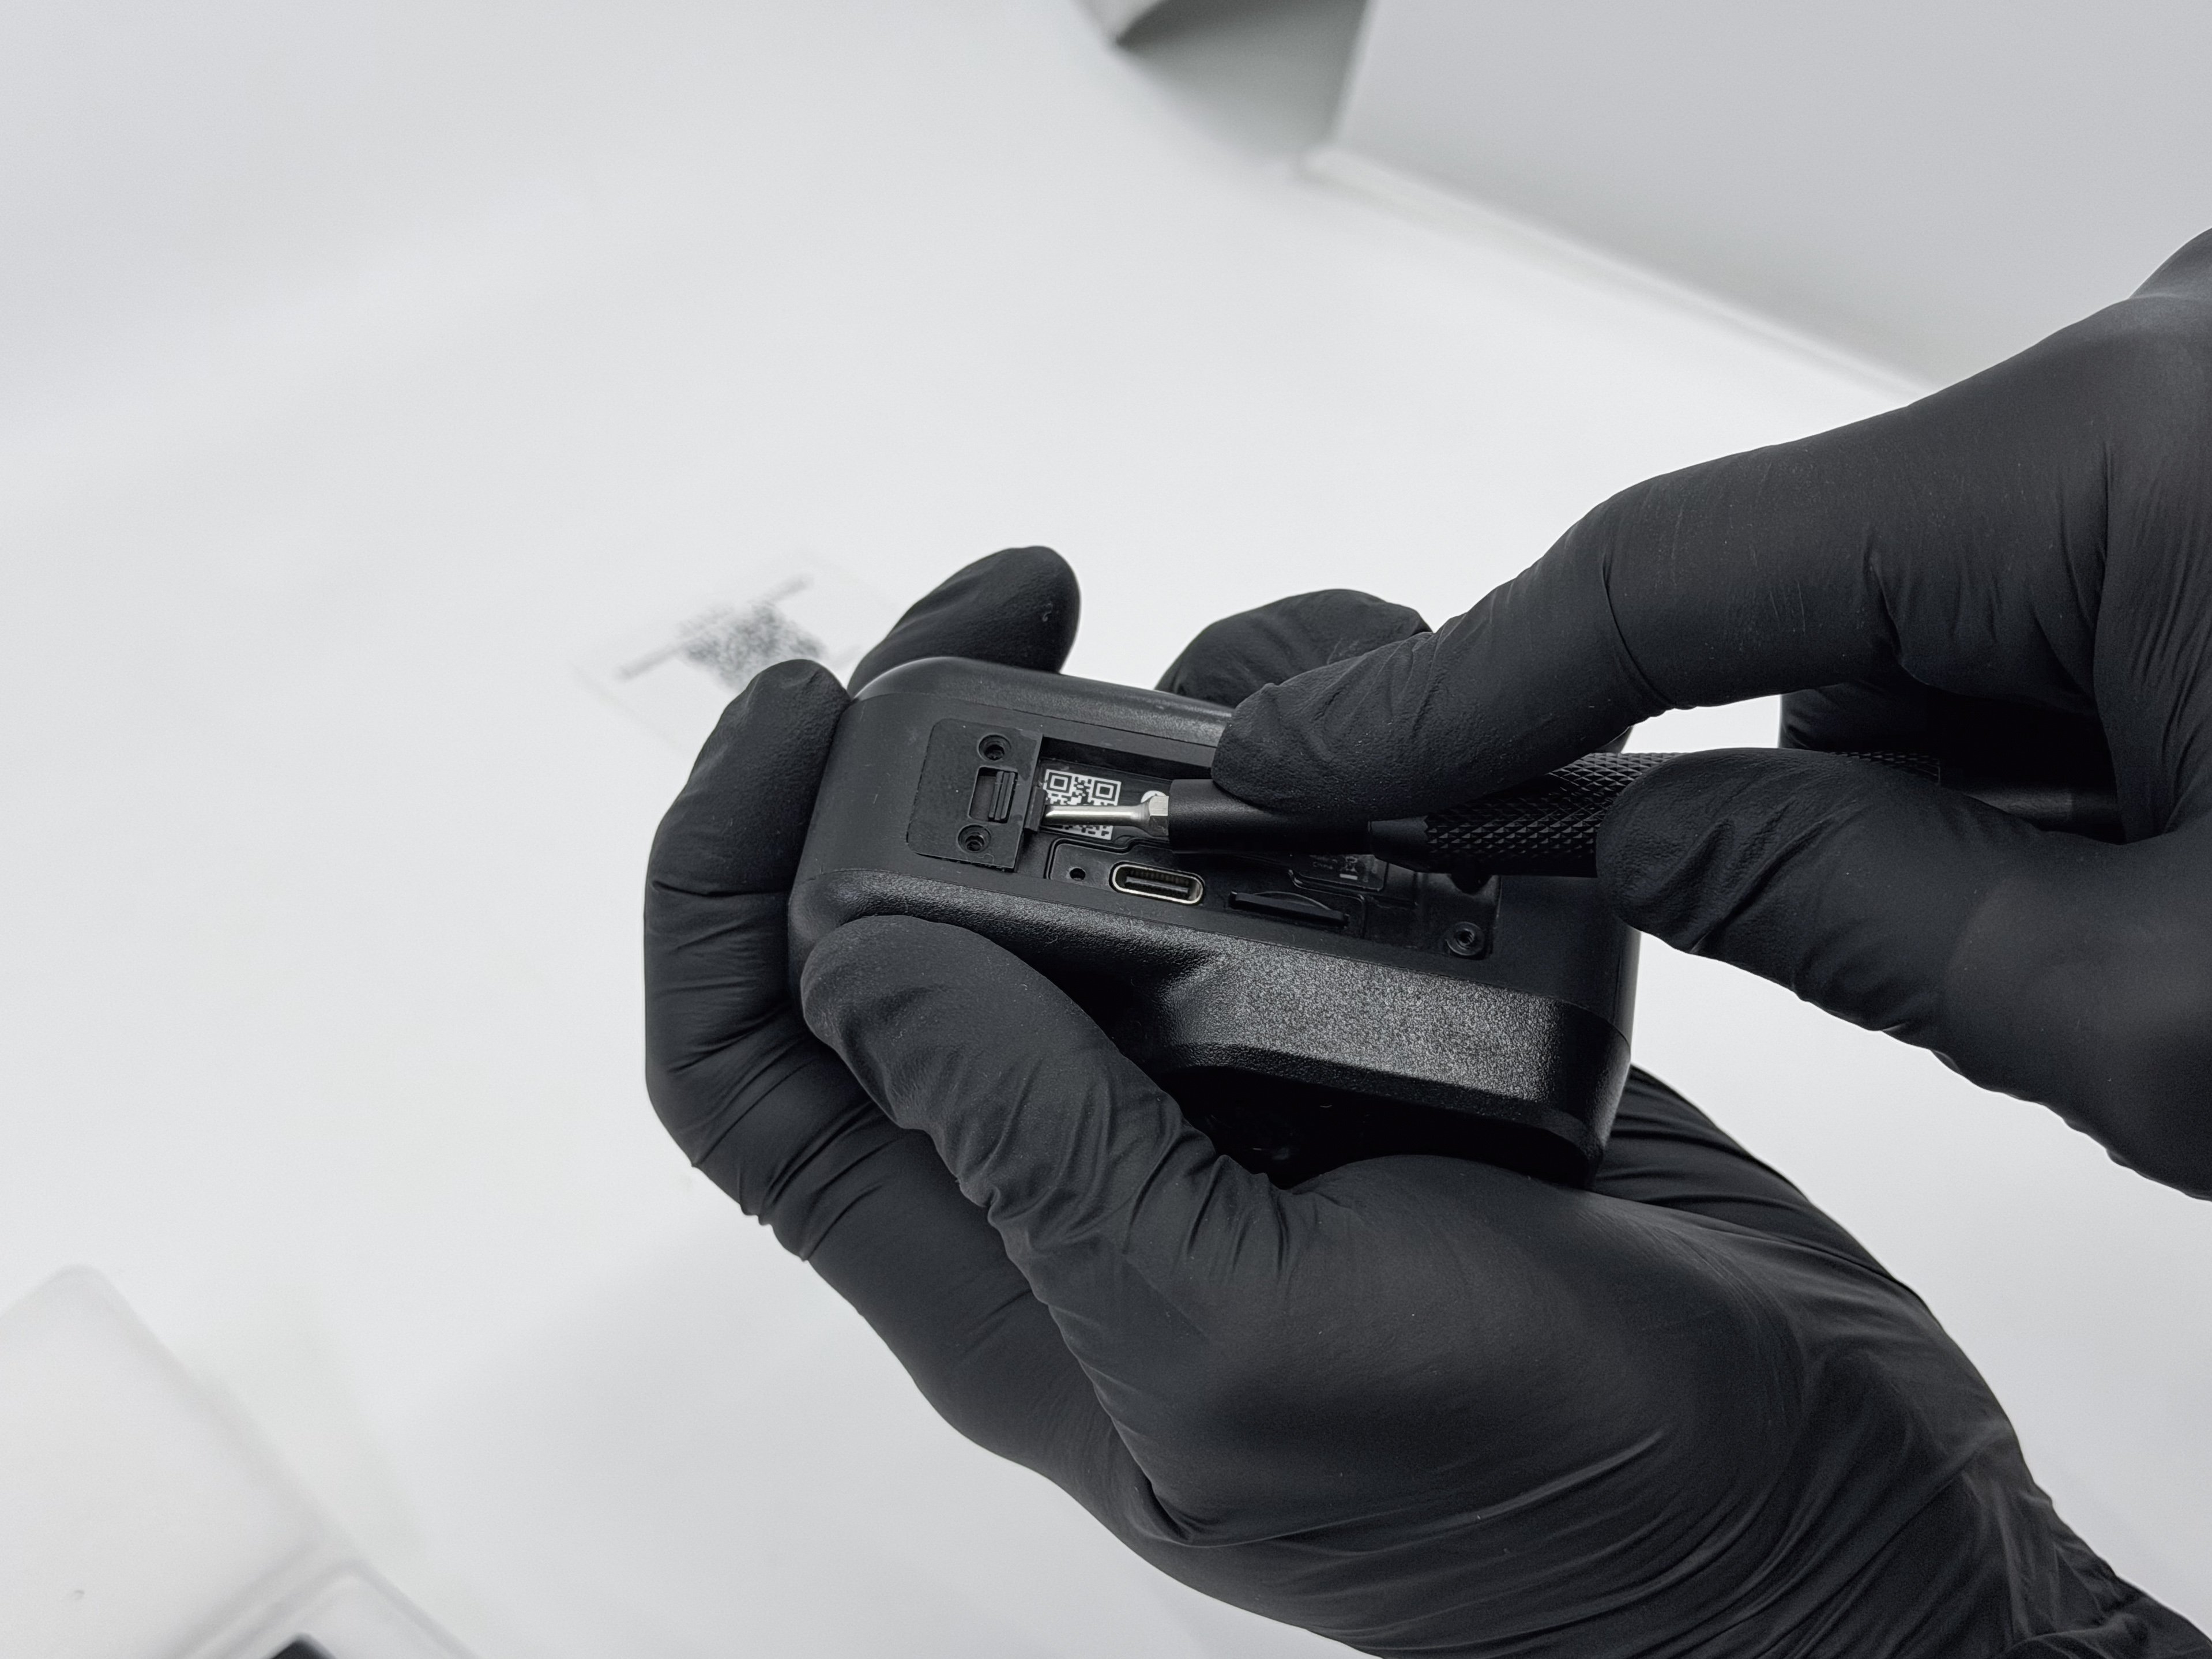
Make sure to take note of the spring and latch placement when you take it off, you'll need to remember this when putting everything together.

Step 5: Identifying the correct screws
Our earlier Fly6 Pro models used a different screw system, you might have noticed there were two different types in your replacement door assembly package. Use the following criteria and images below to identify which ones you need:
Type A (plastic screws): These are for plastic standoffs

Type B (machine screws): These are for metal standoffs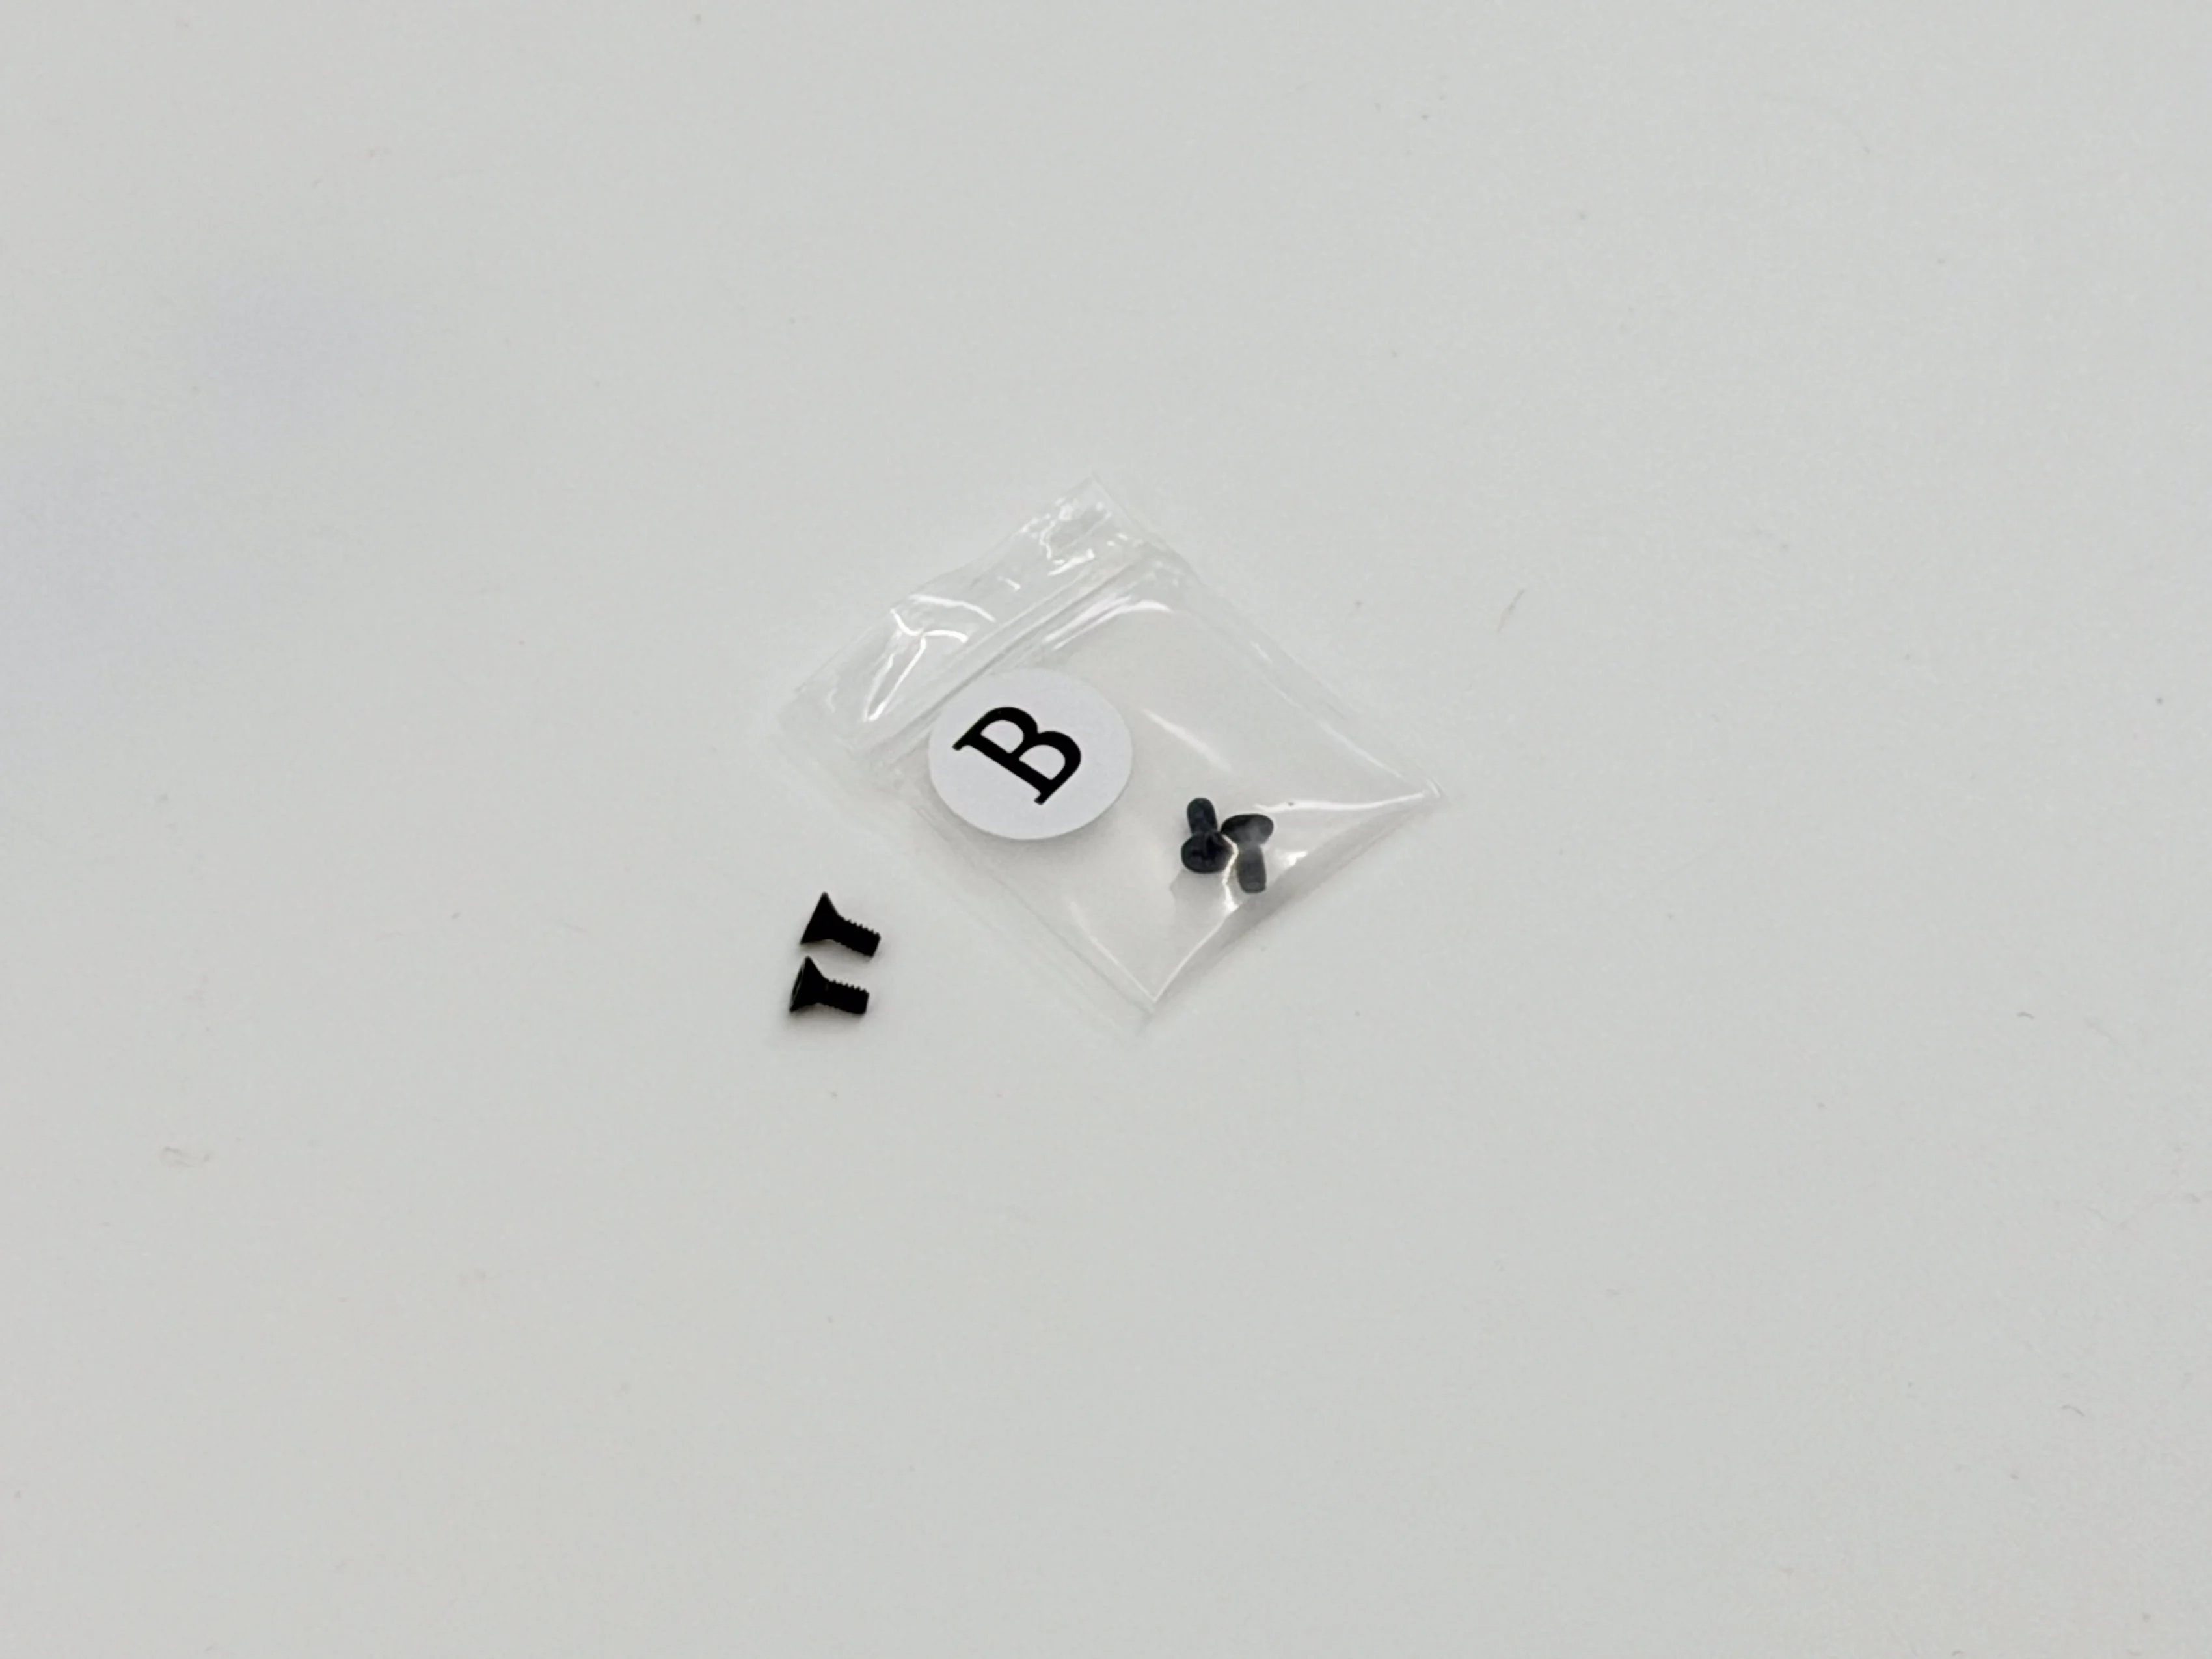
Step 5: Replacing the Latch Assembly
Once you've removed the old door assembly and figured out the correct screws, it's time to put everything together again.
Make sure the spring and latch is in the correct position as earlier (as seen above). Simply press the latch assembly down onto the standoffs. Once in place, use your screw driver to secure the correct type of screws for your device into the new latching system.
Step 6: Attaching the Replacement Door
Place the new hinge and door down on top of the standoffs, and press down to securely fit the hinge. Once in place, insert the new screws and tighten them so everything fits flush. Tightening your screws might be easier with the door closed.
Once you've got your new replacement door installed you're back in business with your Fly6 Pro keeping an eye out from your tail. Happy riding!