Rear Housing RemovalUpdated 5 months ago
So your Fly6 Pro has been working extra hard on your bike and something has gone awry. We've sent you a Replacement Rear Housing, and you're ready to install it. Today we'll cover removing the Rear Housing from your Fly6 Pro and everything you need to perform the work, things you need to be careful of, and just general advice to make sure you feel comfortable working on your device.
Estimated Time required (disassembly only): 10 Minutes
Difficulty: Easy with some potential snags to look out for
Before we get started: required tools
- A pair of fine tipped tweezers OR a sim ejection tool OR another fine tipped instrument
- A long shank Philips Head screwdriver (PH1 recommended)
- Your Fly6 Pro
 Everything you need to get started.
Step 1: Removing the Rear Housing Plugs
These four nifty little plugs in the corners of the Fly6 Pro Rear Housing have been busy keeping water out of your device but now it's time to remove them.![]() The location of the Fly6 Pro's four Plugs
The location of the Fly6 Pro's four Plugs
Using your fine tipped tool, dig the tip into the squishy Plugs and grab and pull, or lever them out. We know this isn't all that easy to do without damaging, so we've included 4 spare Plugs with the Replacement Rear Housing.
The Rear Housing Plugs are not all identical, so try to keep them seperate so you can put your Plugs, or your replacement Plugs back in the matching holes later on.
 Jamie digging into the Fly6 Pro Rear Housing Plugs
Step 2: Removing the Philips head screws
Take extra care: these Philips head screws have been torque'd up seriously tight, so make sure you're very careful not to strip them with a bad screwdriver. That'd be disastrous...
Apply a fair amount of force through the shank of the screwdriver into the head of the screw, and loosen slowly, taking extra care not to strip the head of your screws.
In the image you can see Jamie basically putting his whole body weight into that screwdriver, we mean it, these screws are in tight. Take extra care.
 Jamie applying lots of force to keep the driver head in the screw...
Step 3: Slowly open the housing, cables inside!
Another caution note: the battery is secured to the Fly6 Pro Rear Housing. Open slowly so as to not damage the battery cable or connector.
 Tada! The Fly6 Pro's inner workings.
Step 4: Remove the Battery Bracket from your Rear Housing
There are four more Phillips head screws holding the battery bracket in place on the Rear Housing, and they're a lot easier to get out than the last ones.
Note: before you remove the Battery Bracket, look at how the Battery Cable runs to the main board, as you'll want to try and keep the cable wrapped between the Battery and the Battery Bracket in the same way.
Congratulations! Once you've unscrewed these this is as far as you need delve into your Fly6 Pro, no need to unplug anything or do anything else. Once you get here if you find any dirt, grit or debris (you really shouldn't unless you've been riding with your door open... weren't the beeps annoying?) you should clean that out with a microfiber cloth or paper towel if you have any on hand.
We don't include a replacement battery bracket or screws to secure it. Keep your screws organised! Also be careful not to bend the bracket or lean on it as it is relatively flexible.
 Two of the screws securing the Fly6 Pro Battery Bracket
Next steps:
You're likely here because you need to replace the Rear Housing of your Fly6 Pro. Once you remove the Battery Bracket from the Rear Housing the steps to install the replacement Rear Housing are the same as you just performed in reverse.
 Fly6 Pro ready for a new Rear Housing
Before you start installing your new Fly6 Pro Rear Housing please ensure that it has an O-ring. It will be securely installed in the lip around the edge of the Fly6 Pro Rear Housing, if your Rear Housing doesn't have an O-ring do not hesitate to contact us as this will compromise your Fly6 Pro's waterproofing! 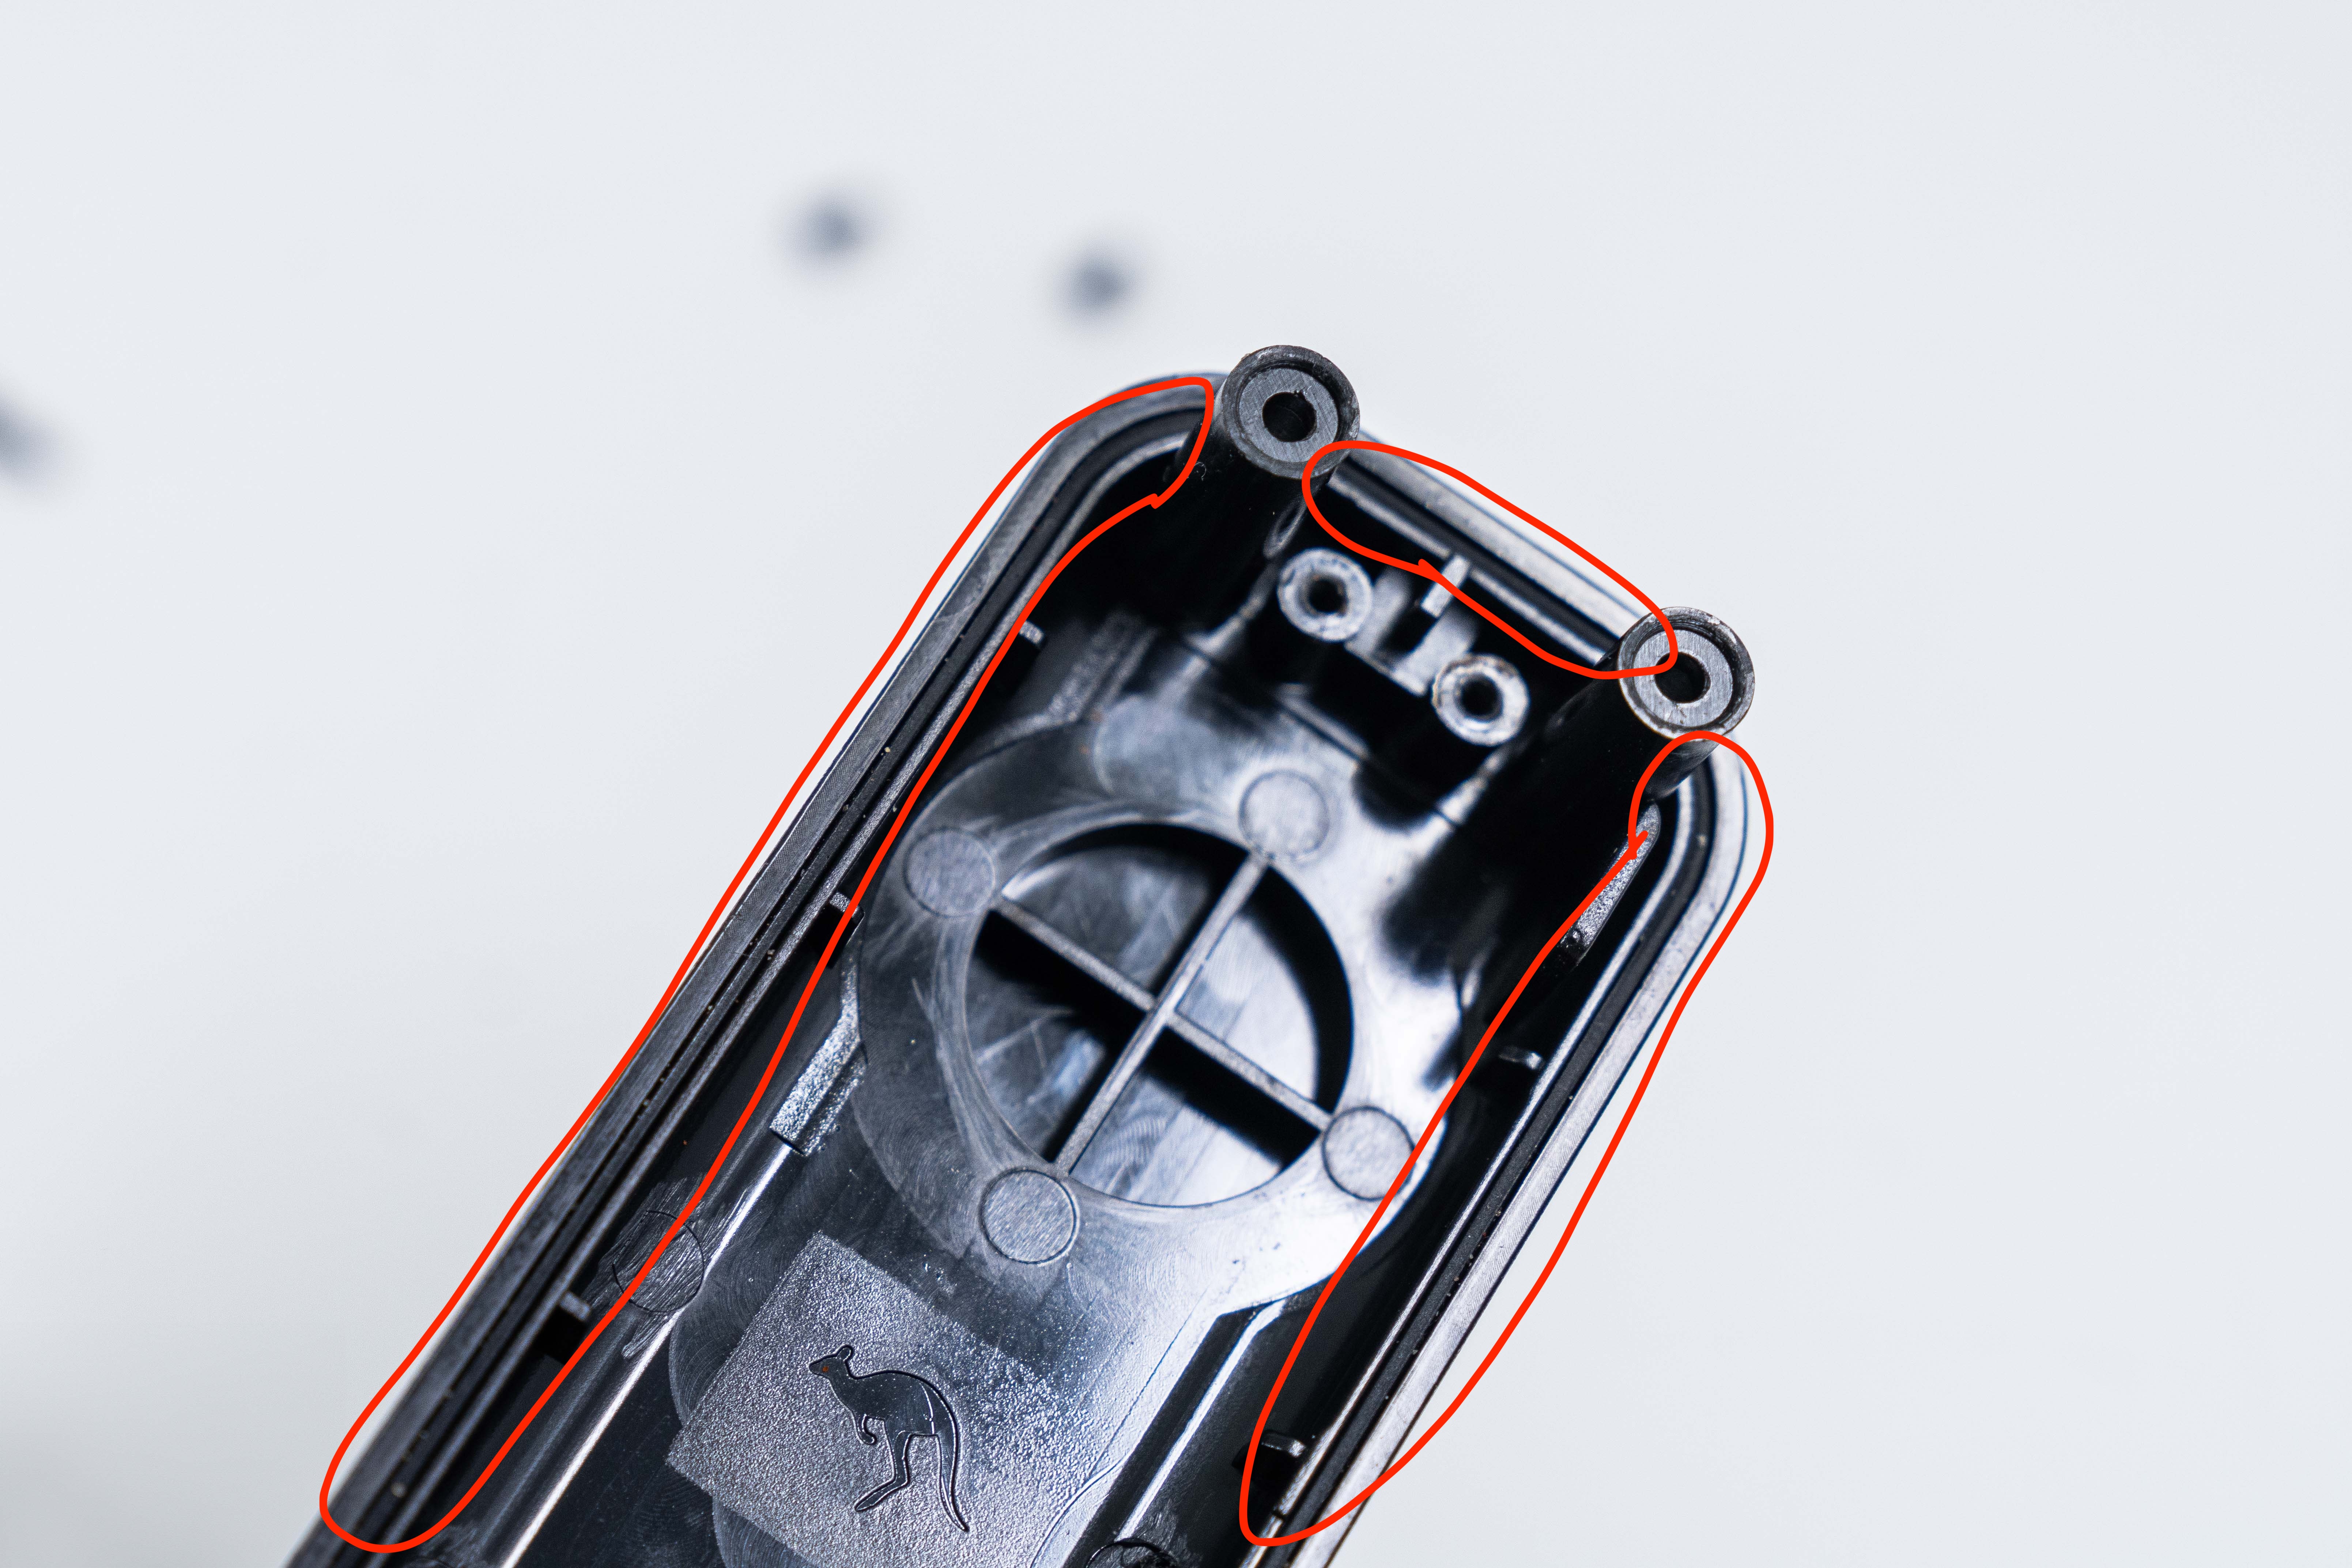 Highlighted O-Ring on the Fly6 Pro Rear-Housing
Installing a new Rear Housing:
- Being careful not to strain the cable, secure your Battery to the new Rear Housing with your Battery Bracket and the screws you removed earlier.
- Take your Fly6 Pro and install the new Rear Housing.
- Using the new screws provided with the Rear Housing, secure the Rear Housing in place.
- Install the Rear Housing Plugs.
Once you've got your new Rear Housing installed you're back in business with your Fly6 Pro keeping an eye out from your tail. Happy riding!